
ASocks User Guide
1. Service Description
ASocks is a cloud-based solution for all sorts of business and personal use cases where anonymity, safety and reliability are essential. The ASocks service provides encrypted connection for safe-surfing on the Internet, unsecured public wi-fi, and restricted web-sites along with protection from getting tracked and blocked by websites and Internet providers.
1.1. How It Works
The ASocks service allows generating ports or URL-links which contain a list of IP-addresses matching the pre-selected geo-settings. The provided IPs and credentials can be used in software products, anti-detect browsers or as a part of your own system for further connection to web-sources.
1.2. Features
- Simultaneous residential proxy connections, low ping, and excellent speed;
- Access to geo-blocked web-sites and services;
- Enormous variety of proxy-servers all around the world;
- Generation of ports with a pool of IP-addresses in accordance with geo-settings;
- “Pay-as-you-go” model which allows a user to control allowance and prevent sudden expiration of traffic;
- Transparent system of the traffic flow and expenditures with a traffic usage report;
- Extremely competitive pricing and favorable referral system;
- API support;
- User-friendly and functional interface;
- 24/7 technical support.
1.3. Supported Formats
- Supported protocols: HTTP and Socks5.
- Supported platforms: Mac, iOS, Windows, Linux.
- Supported web-browsers: Chrome, Chromium, Firefox, Microsoft Edge, Gecko, Opera, Safari.
- Supported anti-detect browsers: Dolphin Anty, Incogniton, Multilogin, Indigo, Kameleo, etc.
1.4. Software supported
- Rubot;
- ZennoPoster;
- Private Keeper;
- Ganesh Bot;
- Web Robots, and others.
1.5. Verified (recommended) web-sites
- AliExpress;
- Amazon;
- Craigslist;
- Homedepot;
- Walmart;
- Aviasales;
- Trivago;
- Booking;
- TripAdvisor;
- Indeed;
- AmazingHiring;
- CVHub, and others.
1.6. Limitations and Restrictions
The ASocks proxy servers are restricted for engaging in the prohibited activities, including but not limited to: spamming, intellectual property violations, illegal or unauthorized access to other computers or networks, distribution of Internet viruses, worms, trojan horses, or other destructive and illegal activities prosecuted by law.
Restricted web-sites | Restricted ports |
|
|
1.7. Use Cases
The proxy servers provided by ASocks can be the great helpers if you are involved in the fields of:
- E-commerce (price comparison, demands for trends and products, keyword research, and account management);
- Resale (sneakerhead, NFT resale, retail market);
- Digital marketing (intelligence research, ad testing, ad check);
- Social media (social media intelligence, managing multiple accounts);
- Travel and tourism (market research, price comparison),
- as well as HR, Web-testing, DaaS, Cybersecurity.
2. Creating an Account
Open the ASocks web-page and enter your account using a sign in form. If you do not have an account on ASocks, create one and use it for entering the service. Set a checkbox to agree with the terms and conditions and press the Create account button.


3. Balance
Once you have entered your account, check the balance. It should be positive to get a connection: the minimum balance should not be lower than 0,5 USD. However, for a stable and reliable connection a user may refill the balance by clicking the Balance tab on the left-side menu, and by pressing the Top up button.

Enter the desired amount to pay, press the Proceed button and follow the instructions on the screen. The minimum accepted amount of payment should not be less than 3 (three) USD.
Moreover, a user can get compensation for the feedback left at Trustpilot and for Telegram account verification.
4. Proxy URL Link
The Proxy URL link option allows a user to get access to the desired web-sources through a browser which uses a list of proxies provided by ASocks. To generate an URL link, set up the preferred location by selecting a country, state, city and ASN from the drop-down list. Note, that the country selection is mandatory, whereas other parameters are optional.
Once the location parameters have been set, the URL link is automatically generated by the system in the corresponding field. A user can copy a link or download the generated proxy list in a .json or .txt format, or to open it in a new tab and apply the provided IP-addresses and ports for further web-connections.

To automate routine web-processes or to promote content, a user can insert the generated link into online services, such as zennoposter, rubot, and others.
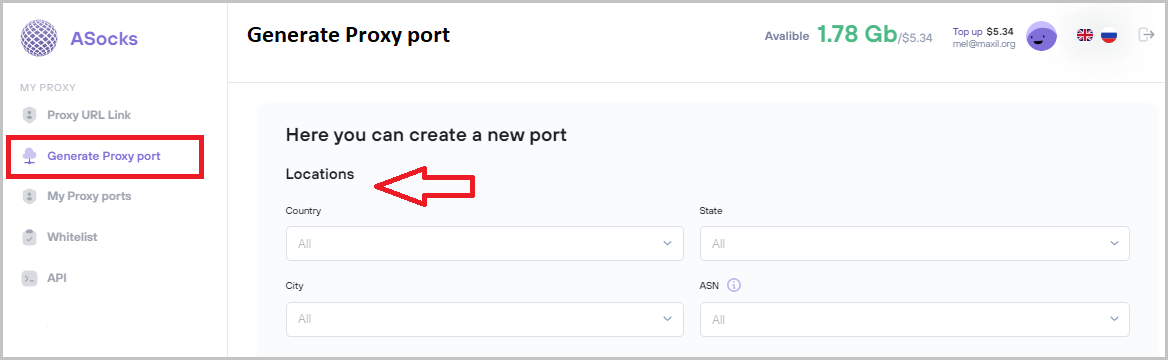
5. Creating a Proxy Server Address in ASocks
Go to the Generate Proxy port tab on the left-side menu and click it. The corresponding window should open. Choose the preferred country, and optionally you may select the state and city from the drop-down lists. ASN is an optional parameter as well, and is used by the advanced users for receiving a proxy from the preferred autonomous system.
Scroll down the page and move to the Proxy settings section. Select one of the options:
- Keep proxy (default option) - the option is used when the proxy server operates until the connection is lost due to the death of the proxy server and/or IP-address. In case of disconnection, the system should automatically restore the connection, but it usually takes time.
- Keep connection - the option provides immediate reconnection which is almost invisible for a user in case of connection loss and/or a proxy server death. The system automatically replaces the dead proxy server with an alive one by choosing it from the list of available proxies.

A user can choose any of the options. For the advanced users having a high demand in a stable connection, the keep connection option is recommended.
Select the Authorization method.
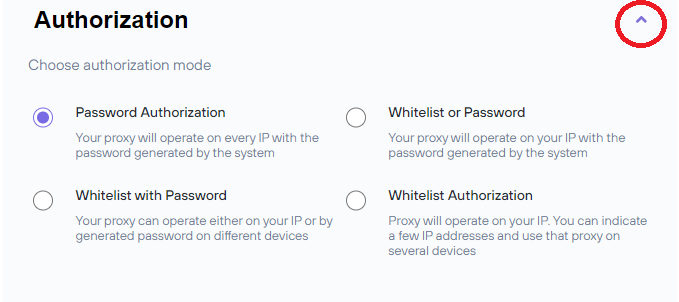
- Password authorization (default option) - this option allows a user’s authorization on any IP-address by using the generated password.
- Whitelist with password - the option requires addition of a user’s IP-address into ASocks whitelist, and it allows connection to a proxy server by using the generated password.
- Whitelist or password - the option requires addition of a user’s IP-address into ASocks whitelist, and it allows choosing the connection method: either by whitelist or by the generated password
- Whitelist authorization - the option requires addition of a user’s IP-address into ASocks whitelist, and the authorization is performed by entering the generated password into the browser settings.
Note: to get included into the ASocks whitelist, it is required to save a user’s actual IP-address on the ASocks service settings. For more details, see the Whitelist section.
A user can choose the most suitable authorization option by clicking it.
Once all the required parameters have been set up, click the Create ip:port button, and the My proxy ports window should automatically open. This section contains all IP-addresses that you have ever been using at the service. Select the required IP-address by clicking it, and the dialog box containing IP-address, port ID, login and password should open. The proxy password is not available for the Whitelist Authorization option only.

Copy the generated credentials and enter them into the corresponding boxes (IP-address and IP-port) of the browser settings that you are currently using.
6. Whitelist
Open the Whitelist tab from the left-side menu, and add your current IP-address.

The current IP-address should be automatically displayed in a corresponding box. A user may give a name of the IP-address by completing the description box, but this feature is optional.
Note: if an IP-address has not been automatically detected by the system, check your public IP via one of the web-services, such as https://www.whatismyip.com, and enter credentials into the IP box.
Press the Add button, so the IP should be automatically included in the ASocks whitelist and displayed in the list.

Once the user’s IP has appeared in the ASocks whitelist system, authorization methods using the Whitelist option become available.
7. API
Open the API tab on the left-side menu. The endpoints data presented in a figure below is used for the REST API platform to connect the proxy servers. The Copy icons are recommended to use for copying the required data.

- The Proxy list link accumulates all proxy servers that you have ever been connected to, when using your account.
- The User info link contains information on a user’s profile.
- The IP Whitelist list contains information on the IP-address registered in the ASocks whitelist system.
Note: if you are not registered in the Whitelist system yet, add your IP in the ASocks system by clicking the IP Whitelist icon on the right top of the ASocks main page. Enter your IP-address in a corresponding field and click the Add button.
8. Referral System
The ASocks service has a favorable referral system available for all registered users which allows attaining the customers and earning and redeeming incentives not only within the ASocks account but withdrawing funds via the cryptocurrency wallet.
The ASocks referral program covers two types of mutually beneficial relationships between the service and customers: user and partnership.
8.1. User
The program involves a user registered at the ASocks service who generates a reference link and places it in social media for general use. The user receives a 30%-compensation (incentives) from the first payment of a referral (a new user) and 10% from further payments performed by the referral within a month. The referral corresponds to a new user who activated the reference link, registered at the ASocks service and made payments.

To generate a referral code, open the Referral system tab. Enter any code (i.g. fb-asocks), add the code description (i.g. fb banner) and specify the budget amount spent for advertisement (i.g. 10 $).
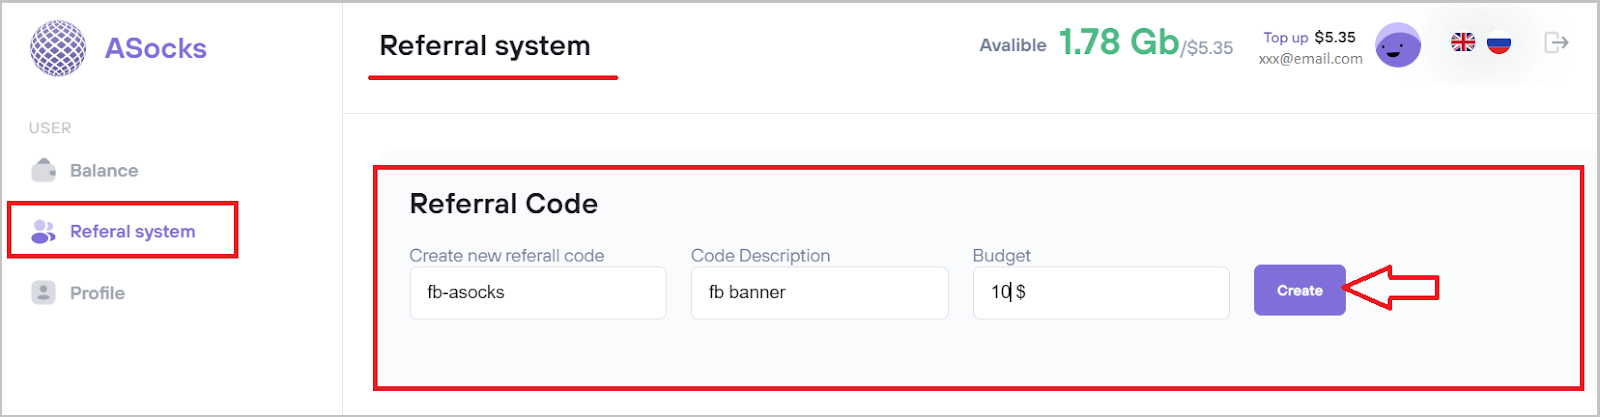
Press the Create button, and the referral code should be immediately generated. All referral codes provided by the service along with profit amounts, number of visits and budget are displayed in a user’s account.
The referral balance section contains information on the amount of compensation granted to a user by the service for the attained referrals. The user can redeem the incentives by paying the service fees or can withdraw the collected funds by using the cryptocurrency wallet.

The ASocks service has a transparent referral system which includes a list of all referrals, their contact information, status and the incentives amount displayed in the user’s account.
A user can transfer the earned incentives to the personal account for further payment within the ASocks service at any time.
A user can withdraw the collected compensations after 20 transactions performed by different referrals. The funds withdrawal is performed within 3 (three) days upon the user's request to the ASocks technical support team.
Note: the funds withdrawal option is currently under development and is not available yet.
8.2. Partnership
To start a partnership with ASocks, create a Partner’s account by contacting the technical support team. In the partner’s account, generate a referral link and a promo code for prospective customers. Place the link with the code at a partner’s web-source and receive incentives from each first payment of a new referral.
- The amount of the partner’s compensation is up to 30% of each first payment of new users (referrals) and 10% of each further payment performed by referrals but not exceeding 1000 USD in total. The partner can redeem the incentives by paying the service fees or can withdraw the collected funds by using the cryptocurrency wallet.
A partner can withdraw the collected compensations after 10 transactions performed by different referrals. The funds withdrawal is performed within 3 (three) days upon the user's request to the ASocks technical support team.
Note: the funds withdrawal option is currently under development and is not available yet.

- The amount of promo code for a new referral varies from 10% to 30% of the first payment. The promo bonuses are transferred to the referral’s account by ASocks and can be redeemed for paying the ASocks service fees.
9. Profile
A user can change personal settings in the Profile tab located at the left-side menu.
The account settings allow changing email address, password, notifications and to view the traffic usage. However, to change the email address registered within the ASocks service, please, contact the ASocks technical support team.

To view the traffic history and to monitor expenditures, press the Details button. The traffic history window should open. The traffic flow and all expenditures can be monitored by choosing the required period in an embedded calendar. Moreover, dates, IP-addresses and port IDs are displayed in the Traffic history report.

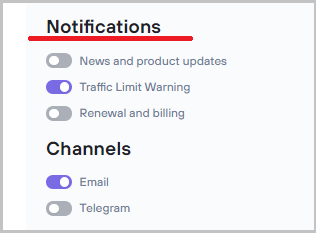
9.1. Notifications
To set up or adjust notifications, open the profile tab and scroll down the page. The Notifications section is located at the bottom of the page. Enable the desired notifications and select the notification method (email or Telegram).
Note: to enable notifications in Telegram, it is required to link the Telegram account.
10. Info
The Info section allows a user to contact the ASocks technical support team directly in Telegram and/or in Live Chat in a 24/7 mode. To contact technical support, open the preferred way of communication by clicking the corresponding tab, and ask a question. Moreover, a user may find a response to a question by referring to the FAQ section.

In addition, the Info section contains legal documentation including Refund and cancellation policy, Terms and Conditions of the service, and Privacy policy.


